Table of Contents
There’s something deeply satisfying about building furniture with your own hands. The scent of fresh-cut wood, the smooth glide of sandpaper across grain, the quiet moment when you step back and realize you’ve created something both beautiful and useful.
A custom coffee table isn’t just a surface for books and morning beverages. It’s a gathering point, a conversation starter, a reflection of your home’s soul. And when you build it yourself, every imperfection becomes a story worth telling.
This guide will walk you through the process of creating a coffee table that fits your space perfectly. Whether you’re drawn to rustic warmth, modern simplicity, or industrial edge, you’ll find the steps and inspiration you need here.
Let’s begin with what makes a coffee table truly yours.
Understanding Your Vision Before You Build
Defining Style and Function
Before you pick up a single tool, sit with your space for a moment. Notice how light moves through your room at different times of day. Consider what you need from this piece—storage underneath, a sleek surface, or perhaps something that doubles as seating when friends visit.
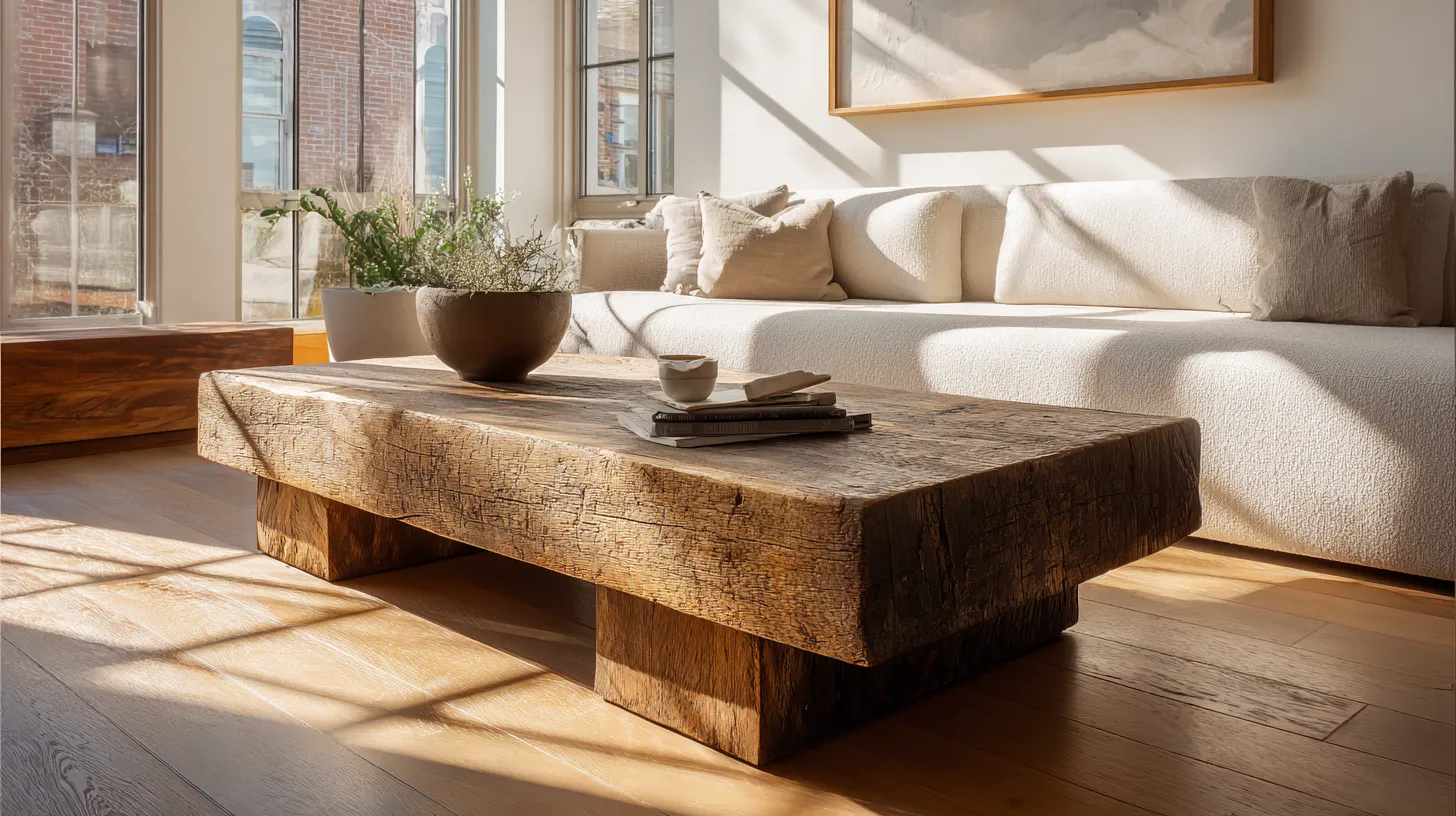
Your coffee table should harmonize with your existing furniture while adding its own quiet presence. A chunky reclaimed wood top brings warmth to minimalist spaces. Clean-lined designs with metal legs complement modern rustic interiors beautifully.
Measuring for Perfect Proportions
Standard coffee table dimensions follow this gentle rule: your table should sit about 16-18 inches high, roughly the same height as your sofa cushions. Length typically ranges from 48-54 inches for most living rooms, though smaller spaces may call for 36-42 inches.
The distance between your sofa and coffee table matters too. Aim for 14-18 inches of breathing room—close enough to reach your cup without stretching, far enough to move comfortably. Width should be about two-thirds your sofa’s length for visual balance.
Walk around your intended spot. Imagine traffic patterns. A custom piece means you can adjust these numbers to suit your life exactly.
Essential Materials and Tools
Choosing Your Wood
The wood you select sets the tone for everything that follows. Each type carries its own character, weight, and warmth.
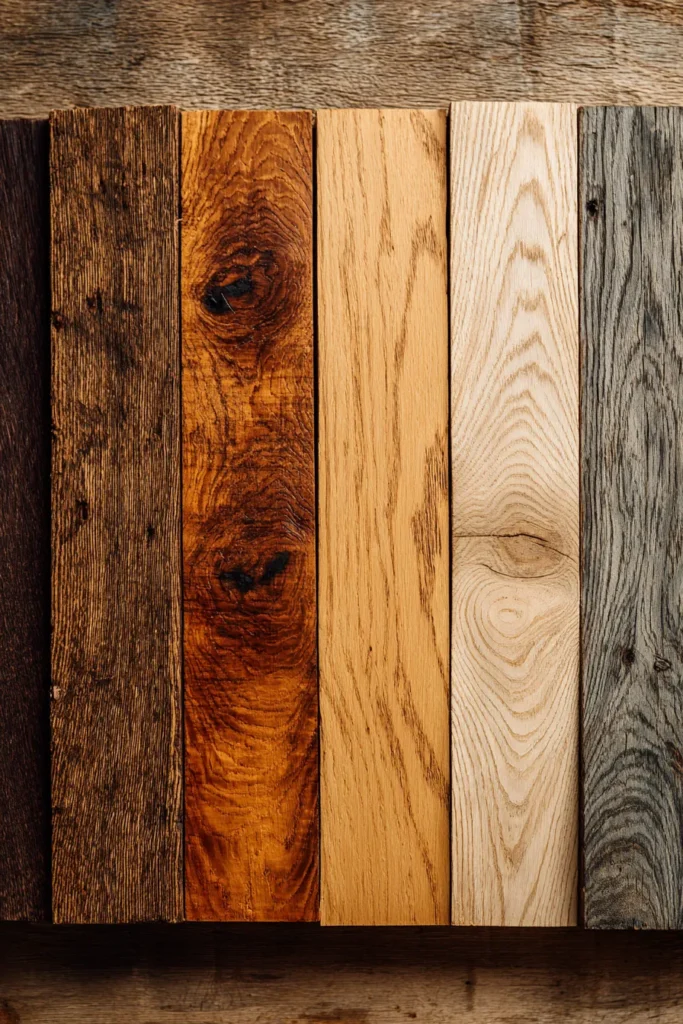
Hardwoods like oak, walnut, and maple offer durability and rich grain patterns. Oak brings golden tones and strength. Walnut darkens beautifully over time, adding sophistication. Maple provides a lighter, contemporary feel with subtle grain.
Softwoods like pine and cedar cost less and work easily, perfect for first-time builders. Pine accepts stain well and develops a lovely patina. Cedar’s aromatic quality adds sensory pleasure to your workspace and finished piece.
Reclaimed wood tells stories through weathered textures and nail holes. It’s an eco-friendly choice that brings instant character. Look for barn wood, old flooring, or salvaged lumber with stable, dry boards.
Gathering Your Tools
| Tool Category | Essential Items | Purpose |
|---|---|---|
| Cutting | Circular saw or miter saw, handsaw | Precise cuts for tabletop and legs |
| Measuring | Tape measure, carpenter’s square, pencil | Accuracy in every dimension |
| Joining | Drill with bits, screwdriver, clamps | Secure assembly |
| Finishing | Orbital sander, sandpaper (80-220 grit), tack cloth | Smooth, touchable surfaces |
| Safety | Safety glasses, ear protection, dust mask | Protecting yourself matters |
You don’t need a fully equipped workshop to start. Many lumberyards will cut boards to size for a small fee, reducing tool requirements significantly.

Additional Materials Checklist
- Wood glue for reinforced joints
- Screws (2.5-3 inches for assembly)
- Table legs (hairpin, tapered wood, or metal—your choice)
- Mounting brackets or corner braces
- Finish of choice (polyurethane, wax, oil, or paint)
- Wood filler for imperfections
- Clean rags and brushes
Step-by-Step Building Process
Planning Your Design
Sketch your vision on paper first. Include measurements, leg placement, and any special features like lower shelves or inset surfaces. This planning phase prevents costly mistakes and helps you visualize proportion.
Consider whether you want a single solid slab, planks joined side-by-side, or a framed top with center panels. Each approach offers different aesthetic and structural qualities.
Transfer your design to the wood using a straightedge and pencil. Double-check all measurements—woodworkers say “measure twice, cut once” for good reason.
Cutting and Preparing the Tabletop
Lay out your boards and examine grain direction. Alternating growth rings (up and down) helps prevent warping over time. Arrange pieces until the pattern pleases your eye.
Make your cuts slowly and deliberately. A circular saw works well for straight lines. Support long boards properly to prevent binding or kickback. If you’re new to power tools, practice cuts on scrap wood first.
Safety reminder: Always wear protective eyewear and keep your hands clear of blade paths. A moment of caution prevents lasting regret.
Sand all cut edges immediately. This removes splinters and prepares surfaces for joining. Start with 80-grit sandpaper to smooth rough spots, then progress to 120-grit for a refined feel.
Joining Boards for Wider Tops
If your design requires joining multiple boards, apply wood glue evenly along edges. Press boards together and secure with clamps every 12-18 inches. Alternate clamp positions above and below to prevent bowing.
Wipe away excess glue with a damp cloth before it dries. Let the assembly cure for at least 24 hours—rushing this step compromises strength. The wait teaches patience, a woodworker’s quiet virtue.
For extra stability, consider adding biscuits or dowels at joints, or attaching cleats underneath perpendicular to the grain. These methods prevent separation as wood expands and contracts with humidity changes.
Attaching Legs with Precision
Leg placement affects both stability and aesthetics. Measure carefully and mark positions with pencil on the underside of your tabletop.
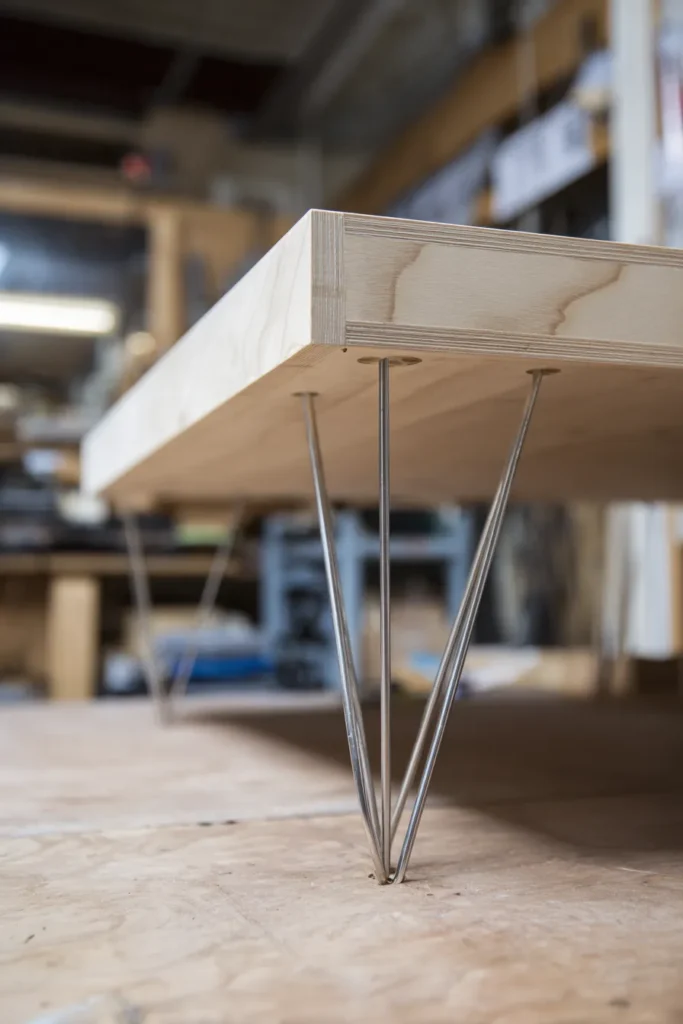
For hairpin or metal legs: Drill pilot holes slightly smaller than your screws. This prevents wood splitting while ensuring tight connections. Attach mounting plates first, then screw legs into place.
For wooden legs: Corner braces or apron boards create sturdy joints. Pre-drill holes, apply wood glue, and drive screws at angles for maximum hold. Wipe away any glue squeeze-out immediately.
Pro tip: Attach legs in pairs first, then add remaining legs. This lets you adjust for any slight unevenness in your floor or tabletop. Set the table upright on a flat surface and check for wobble before final tightening.
If you encounter uneven legs, sand the longer ones gradually until the table sits stable. Take small amounts at a time—it’s easier to remove more than to add wood back.
Creating Lower Shelves (Optional)
A lower shelf adds storage and visual weight, grounding your design. Position it 6-8 inches above the floor, measured from the bottom of your legs.
Cut shelf boards to fit between legs, allowing 1/4 inch clearance on all sides. Attach using brackets or by creating a simple frame that screws into leg interiors. This modification transforms a basic table into a multifunctional piece.
Finishing Touches That Transform
Sanding for Silken Surfaces
Begin with 120-grit sandpaper across all surfaces, working with the grain. This removes tool marks and levels any inconsistencies. Progress to 150-grit, then finish with 220-grit for surfaces that invite touch.
Pay special attention to edges and corners—these areas receive the most contact and should feel gentle under hands. Round sharp corners slightly for a softer, more organic feel.
After final sanding, wipe everything down with a tack cloth. These sticky sheets remove fine dust that would mar your finish. Run your hand across the wood—it should feel like warm silk.

Choosing and Applying Finish
Your finish protects wood while enhancing its natural beauty. Each option creates different effects.
Polyurethane provides durable, water-resistant protection ideal for busy households. Apply thin coats with a quality brush, sanding lightly between coats. Three coats create professional-level protection.
Danish oil or tung oil penetrates wood, bringing out grain depth while leaving a natural feel. Wipe on generously, let sit for 15 minutes, then wipe off excess. Multiple applications build subtle sheen and protection.
Wax offers a soft, traditional finish with a lovely scent. Buff with a clean cloth until it glows. Wax requires occasional reapplication but rewards you with a touchable surface that develops character over time.
Paint works beautifully for modern or coastal styles. Use primer first, then two coats of quality furniture paint. Distress edges lightly for a lived-in look, or keep clean for contemporary simplicity.
Allow finish to cure fully before use—usually 24-72 hours depending on product. Your patience here determines durability for years to come.
Final Details and Problem-Solving
Fill any nail holes or small imperfections with wood filler matching your stain color. Sand smooth when dry. These small attentions elevate homemade into handcrafted.
If you notice surface scratches during finishing, don’t panic. Sand the area with fine-grit paper, feather edges, and reapply finish to that section. Most imperfections disappear with gentle care.
For lasting beauty, place felt pads under leg bottoms. These protect both your table and floors while allowing easy movement. Use coasters and placemats to prevent water rings and heat marks.
Budget Planning for Your Project
Building your own coffee table costs significantly less than purchasing custom furniture. Here’s what to expect:
| Expense Category | Budget Range | Mid-Range | Premium |
|---|---|---|---|
| Wood | $30-$80 | $80-$150 | $150-$300+ |
| Legs/Hardware | $20-$40 | $40-$80 | $80-$150 |
| Finish/Supplies | $15-$30 | $30-$60 | $60-$100 |
| Tools (if needed) | $50-$100 | $100-$250 | $250-$500+ |
| Total (with tools) | $115-$250 | $250-$540 | $540-$1,050+ |
Most builders spend $150-$300 for a quality table when they own basic tools. Reclaimed wood reduces costs while adding character. Borrow or rent specialty tools to keep expenses down.
Sustainable and Eco-Friendly Choices
Creating furniture from reclaimed materials honors resources already in the world. Salvaged barn wood, old fence boards, and shipping pallets offer unique textures impossible to replicate with new lumber.
Source locally when possible. Local sawmills often sell offcuts and imperfect boards at reduced prices—perfect for smaller projects. This reduces transportation impact and supports nearby businesses.
Choose low-VOC finishes to keep indoor air quality healthy. Natural oils and waxes work beautifully without chemical odors. Your home deserves materials that care for both people and planet.
Consider modular designs with removable legs. Future you might need different height, style, or size. Building for flexibility extends your table’s useful life indefinitely.
Design Variations to Inspire
Rustic Farmhouse Style
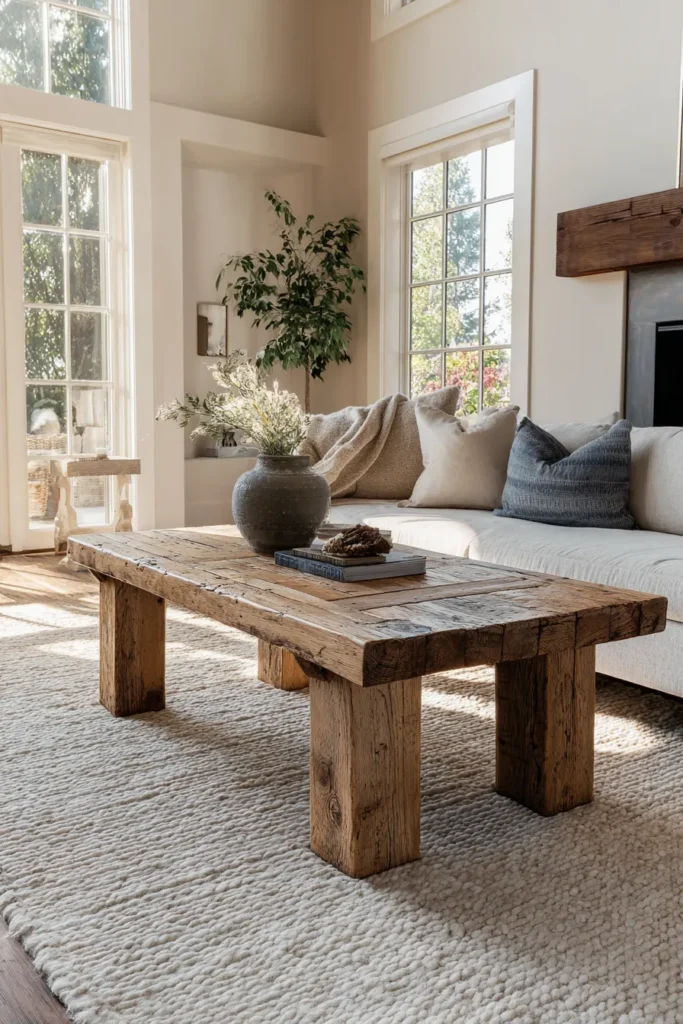
Thick reclaimed planks paired with chunky wooden legs create warm, gathering-friendly pieces. Leave some weathering visible—it tells stories. Finish with natural oil to enhance grain without hiding character.
Add metal corner brackets or exposed bolts for industrial rustic fusion. This style welcomes imperfection as part of its charm.
Modern Minimalist Approach
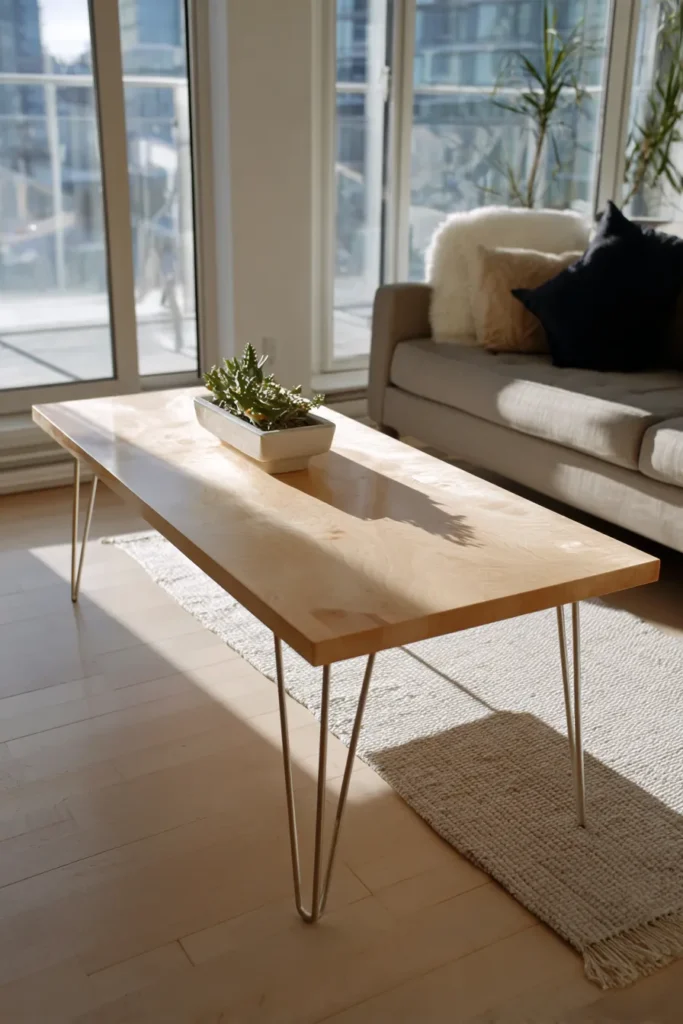
Clean lines, light woods like maple or birch, and sleek hairpin legs define contemporary design. Keep surfaces smooth and uniform. Apply matte polyurethane for subtle protection that doesn’t shine.
Consider floating shelf elements or asymmetrical proportions for visual interest without clutter. Less becomes more when every element serves purpose.
Industrial Edge
Combine rough-sawn wood with metal pipe legs or steel frames. Dark stains or natural unsealed finishes work well. Add castors underneath for mobility that suits loft-style spaces.
This aesthetic celebrates raw materials and honest construction. Let screw heads show. Embrace the unfinished quality that industrial design loves.
Multifunctional Innovation
Build lift-top mechanisms that raise surfaces for laptop work or dining. Add hidden storage compartments underneath. Create nesting tables that separate when you need extra surface area.
These solutions maximize small-space living without sacrificing style. Function and beauty support each other in thoughtful design.
Key Takeaways for Your Build
- Measure carefully and plan thoroughly before cutting any wood
- Choose wood type based on budget, desired aesthetic, and skill level
- Invest in safety equipment—protecting yourself matters more than speed
- Take your time with finishing—proper curing makes the difference between amateur and refined
- Pre-drill all screw holes to prevent splitting and ensure straight attachment
- Sand progressively through grits for professional-feeling surfaces
- Consider reclaimed materials for character and environmental responsibility
- Test stability before applying finish—easier to adjust before sealing
- Apply finish in thin coats rather than thick single applications
- Let each step cure fully before moving forward
Troubleshooting Common Challenges
Uneven legs causing wobble: Place table on flat surface and identify which leg is longest. Sand gradually until stable, or add adjustable feet to all legs for flexibility on uneven floors.
Surface scratches after finishing: Lightly sand affected area with 220-grit paper, blend edges, and reapply one coat of finish. Feather the edges so new finish blends seamlessly.
Wood splitting when driving screws: Always drill pilot holes slightly smaller than screw diameter. This is especially important within two inches of board edges where splitting risk increases.
Gaps appearing between joined boards: This happens with humidity changes. Fill small gaps with color-matched wood filler. For larger gaps, consider adding a decorative inlay strip that makes the gap intentional.
Finish appears blotchy or uneven: Some woods absorb stain unevenly. Use pre-stain wood conditioner on pine and other softwoods. Apply stain quickly and wipe consistently for uniform color.
Bringing Your Table Home
The moment you place your finished coffee table in its intended spot, something shifts. Your room feels more complete, more yours. Sunlight catches the grain you chose, highlighting the care you invested.
This isn’t just furniture. It’s evidence of your capability, a tangible reminder that you can shape the spaces you inhabit. Every time you set down a cup, arrange flowers, or gather friends around it, you’ll remember the satisfaction of creation.
Building your own coffee table teaches patience, precision, and the quiet joy of making. These lessons extend far beyond woodworking. They remind us that beautiful, functional things don’t require vast budgets—just vision, effort, and willingness to learn.
Your hands can create the home you imagine. This coffee table is just the beginning.
Frequently Asked Questions
What type of wood is best for beginners building a coffee table?
Pine offers the easiest starting point for new builders. It’s affordable, readily available, and cuts easily with basic tools. The soft nature makes it forgiving for learning joinery and finishing techniques. For slightly more investment, poplar provides similar workability with a finer grain that accepts paint beautifully. Both woods allow you to focus on technique rather than wrestling with hard-to-cut materials.
How do I attach legs to a coffee table securely?
Pre-drill pilot holes to prevent wood splitting, then use corner braces or mounting plates designed for your leg style. Apply wood glue at joints for added strength, and drive screws at slight angles for maximum hold. For hairpin or metal legs, attach the mounting plate first with multiple screws, ensuring it sits flush against the tabletop. Always check stability before finishing—adjustments are easier before sealing wood.
Can I build a coffee table without expensive power tools?
Absolutely. Many lumberyards and home improvement stores cut wood to your specifications for minimal fees. With pre-cut pieces, you need only a drill, sandpaper, clamps, and basic hand tools. A handsaw works for small adjustments. This approach actually teaches fundamentals better than relying on power tools from the start. Your first table might take longer, but the skills you develop transfer to every future project.
How long should I wait before using my newly finished coffee table?
Curing time depends on your finish choice. Water-based polyurethane dries in 24 hours but needs 7-14 days to fully cure. Oil-based finishes require 24-48 hours before light use, with full cure taking up to 30 days. Natural oils like tung or linseed need 3-5 days between coats and a week after the final application. Rushing this step risks sticky surfaces, fingerprints in finish, or premature wear. Patience here protects all your earlier work.
What’s the best way to maintain a handmade coffee table long-term?
Use coasters consistently to prevent water rings and heat marks. Dust regularly with soft, dry cloths—microfiber works beautifully. Clean spills immediately with a barely damp cloth, then dry thoroughly. Avoid harsh chemicals or abrasive cleaners that damage finish. Reapply wax annually if you used wax finish, or add a fresh coat of oil every year or two for oil-finished pieces. With simple, regular care, your handmade table develops deeper character and beauty with each passing year.