Table of Contents
By ERYLIN — Your Guide to Calm, Considered Living
There is something quietly powerful about a beautifully set table. Not the grand, flower-laden kind — but the kind that feels intentional, unhurried, and deeply human. That’s the essence of Japandi: a design philosophy born from the marriage of Japanese minimalism and Scandinavian warmth, and it belongs just as much at your dinner table as it does in your living room.
Napkin rings are one of the smallest details in a table setting, yet they carry enormous weight. They signal care. They frame linen softly. They say someone thought about this. And when those rings are handmade from natural materials — bamboo scraps, linen twine, washi paper — they become tiny works of art.
This guide will walk you through three DIY Japandi napkin ring designs that cost under ₱100 per ring, require no power tools, and can be made in a single afternoon. Whether you’re styling a slow Sunday brunch or hosting an intimate dinner, these pieces will ground your table in texture, calm, and quiet beauty.
Let’s begin.
What Is Japandi Style and Why It Works at the Table
Japandi is not just an aesthetic — it’s an attitude toward space. It asks: what is necessary? What is beautiful? Can something be both?
The palette is honest: warm beiges, muted blacks, raw wood tones, dusty sage, off-white linen. The materials are natural and tactile — rattan, bamboo, stone, unbleached cotton. Nothing shouts. Everything belongs.
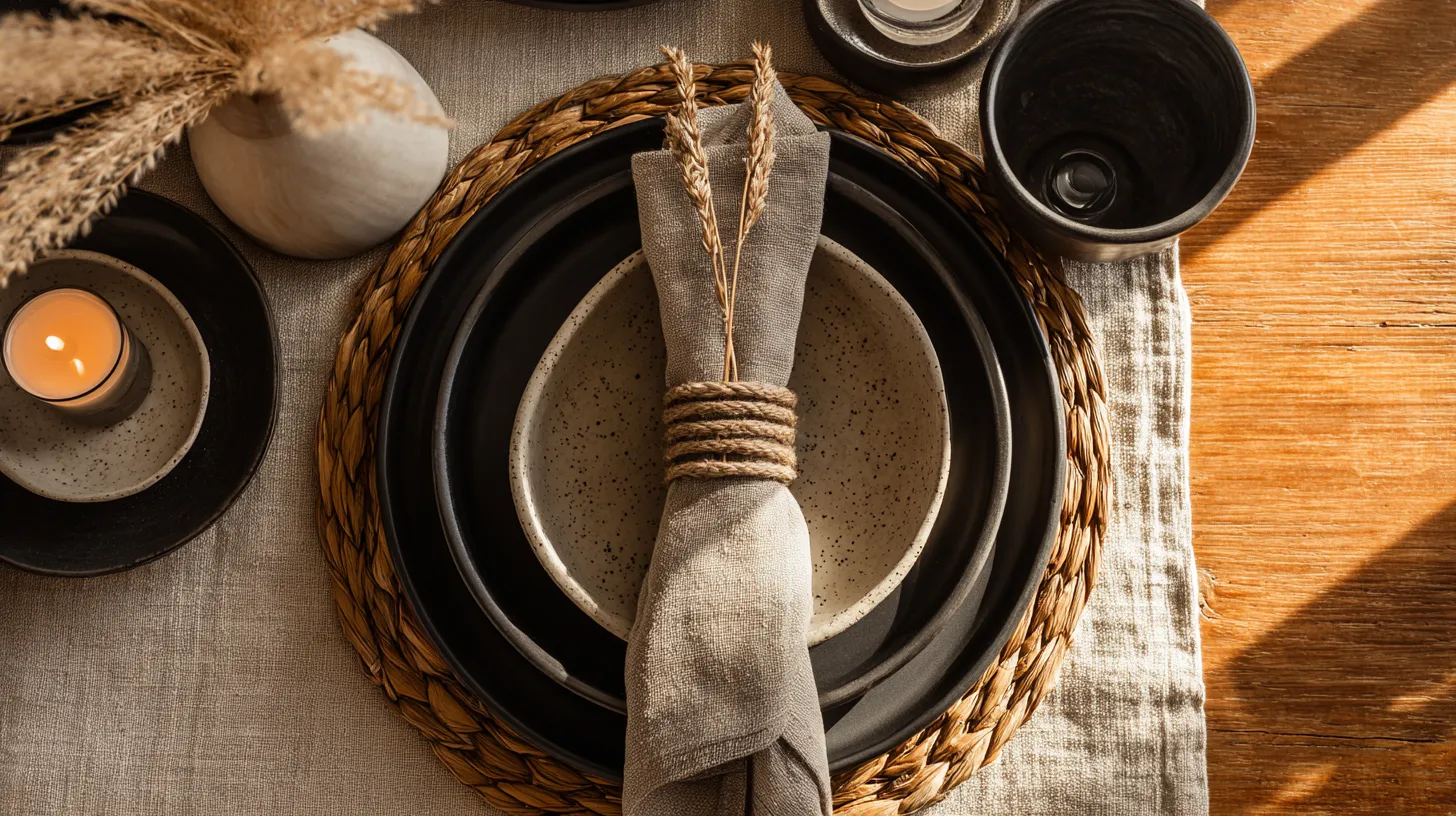
When applied to a dining table, Japandi creates a sensory atmosphere rather than a styled moment. Rough linen napkins, a ceramic bowl of salt, a single stem in a bud vase, and handcrafted napkin rings — together, these elements breathe. They invite guests to slow down before the first course even arrives.
The Core Principles of Japandi Design
- Ma (間) — Japanese concept of negative space; let your table breathe
- Wabi-sabi — embrace imperfection; a slightly uneven wrap of twine is more beautiful, not less
- Lagom — Scandinavian idea of “just enough”; resist the urge to over-decorate
- Natural materials first — if it grew from the earth, it likely belongs on a Japandi table
- Function as beauty — every element must serve a purpose and feel good
Materials You’ll Need (All Sourced Locally)
Before you begin crafting, gather your materials. Most of these can be found in Divisoria, your local palengke craft stalls, or repurposed from packaging you already have at home.
| Material | Use | Estimated Cost (PHP) |
|---|---|---|
| Bamboo tube scraps or cardboard rolls | Ring base | ₱0–₱20 |
| Linen twine or abaca rope | Wrapping | ₱30–₱50/roll |
| Washi tape or Japanese tissue paper | Origami rings | ₱25–₱40/pack |
| Craft glue or hot glue gun | Adhesive | ₱15–₱30 |
| Dried moss, pebbles, or small shells | Embellishment | ₱0–₱20 |
| Matte black or earth-tone paint | Finishing | ₱25–₱40 |
| Sandpaper (fine grit) | Smoothing wood | ₱10–₱15 |
Total per ring: approximately ₱60–₱100 depending on materials chosen.
A note on sustainability: bamboo scraps from furniture shops in Cainta or Marikina are often given away for free. Abaca rope is locally grown, biodegradable, and deeply aligned with both Filipino craft heritage and Japandi values. Choose it over plastic ribbon every time.
3 DIY Japandi Napkin Ring Designs
Design 1: The Twine-Wrapped Wood Ring
Best for: beginners, rustic-modern tables, everyday use
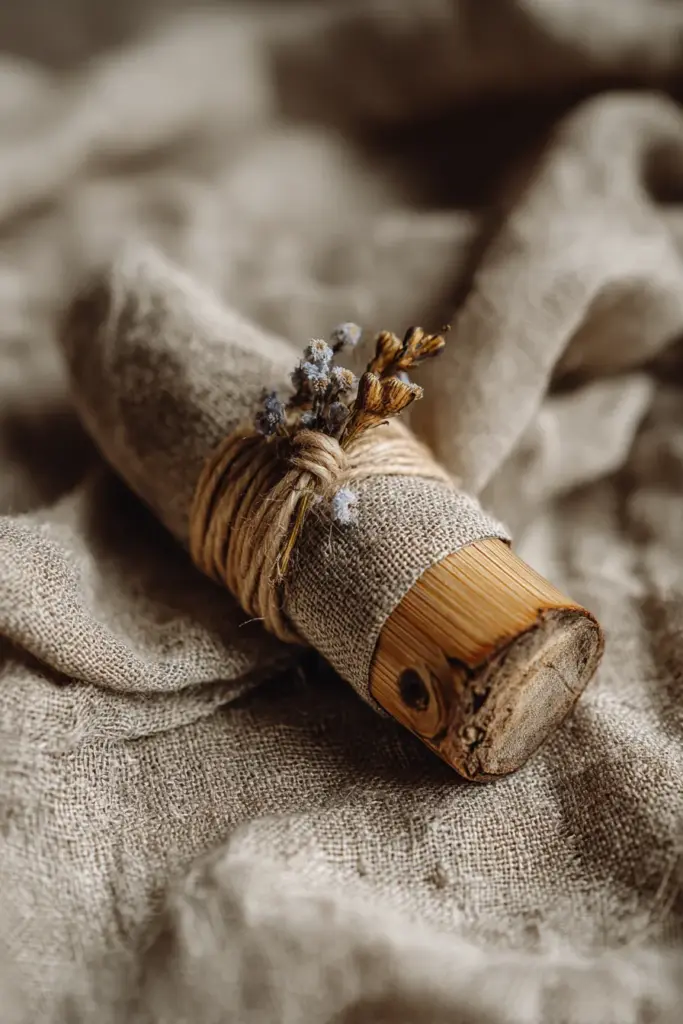
This is the most forgiving design — and perhaps the most meditative to make. The repetitive wrapping of twine around a bamboo or wooden ring becomes almost like a form of slow craft, a small ritual.
What You’ll Need
- Bamboo tube cut to 4–5 cm width (a hardware shop or craft store will often cut these for you)
- Natural linen twine or abaca rope
- Craft glue
- Optional: a tiny dried flower or sprig of dried eucalyptus tucked into the wrap
Steps
Step 1: Prepare the base. If using bamboo, lightly sand the edges with fine-grit sandpaper until smooth. If using a cardboard tube (like from paper towels), cut to width and reinforce the inside with a thin layer of glue to add rigidity.
Step 2: Apply a base coat of glue. Brush a thin layer of craft glue around the exterior of the ring. This helps the first layer of twine grip without slipping.
Step 3: Begin wrapping. Start at one edge and wrap the twine tightly and evenly, keeping tension consistent. Work your way across the ring row by row, applying small dots of glue as you go every few rotations.
Step 4: Finish and secure. At the final edge, tuck the end of the twine under the last few wraps and secure with a drop of glue. Hold in place for 30 seconds.
Step 5: Embellish, if desired. Tuck a tiny dried stem or a single dried flower under the final wrap on one side. This small gesture adds organic life without competing with the minimalist form.
Common issue: twine slipping during wrapping. Let the base glue layer dry slightly — tacky, not wet — before you begin. A clothespin can hold the starting end in place while you work.
Design 2: The Origami Paper Ring
Best for: special occasions, gifting, a touch of Japanese wabi-sabi
This design uses washi paper or thin craft paper to create a structured, sculptural ring with an unmistakably Japanese soul. No glue required for the folding itself — just patience and clean creases.
What You’ll Need
- Washi paper or textured craft paper in muted tones (ivory, charcoal, dusty blush)
- A cylindrical object to shape around (a lip balm tube, a marker, a small bottle)
- A bone folder or the back of a spoon for crisp folds
- Optional: a light mist of water-based sealant to protect from humidity
Steps
Step 1: Cut your paper. Cut a strip approximately 25 cm long and 4 cm wide. The texture and color of washi paper will do most of the design work — choose one with a subtle pattern or a soft fiber texture.
Step 2: Fold accordion-style. Fold the strip in even accordion pleats, about 1 cm wide each. Press each fold firmly with your bone folder.
Step 3: Form the ring. Wrap the accordion strip around your cylindrical object and connect the two ends by slipping one set of pleats into the other, interlocking them without glue.
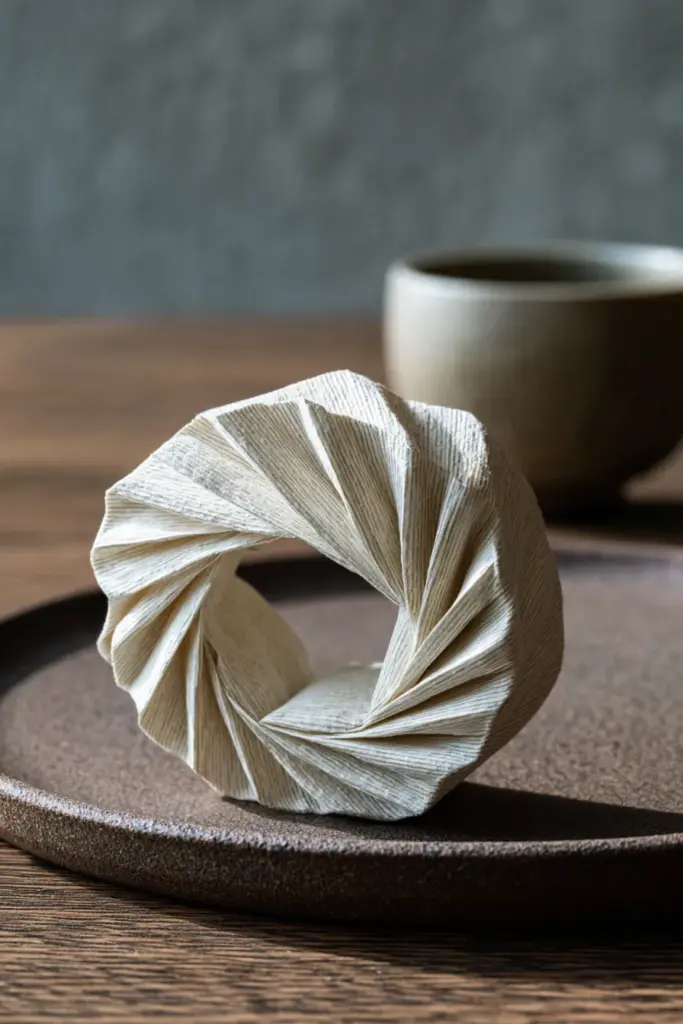
Step 4: Shape and adjust. Gently fan or compress the pleats to create the look you want — a fuller, flower-like silhouette or a tighter, more architectural ring.
Tropical climate tip: The humidity in the Philippines can cause paper rings to soften over time. A light coat of matte sealant spray (available at National Bookstore) will protect the paper without changing its texture or sheen.
Design 3: The Stone-Embedded Ring
Best for: elevated dinner settings, a dramatic minimalist statement
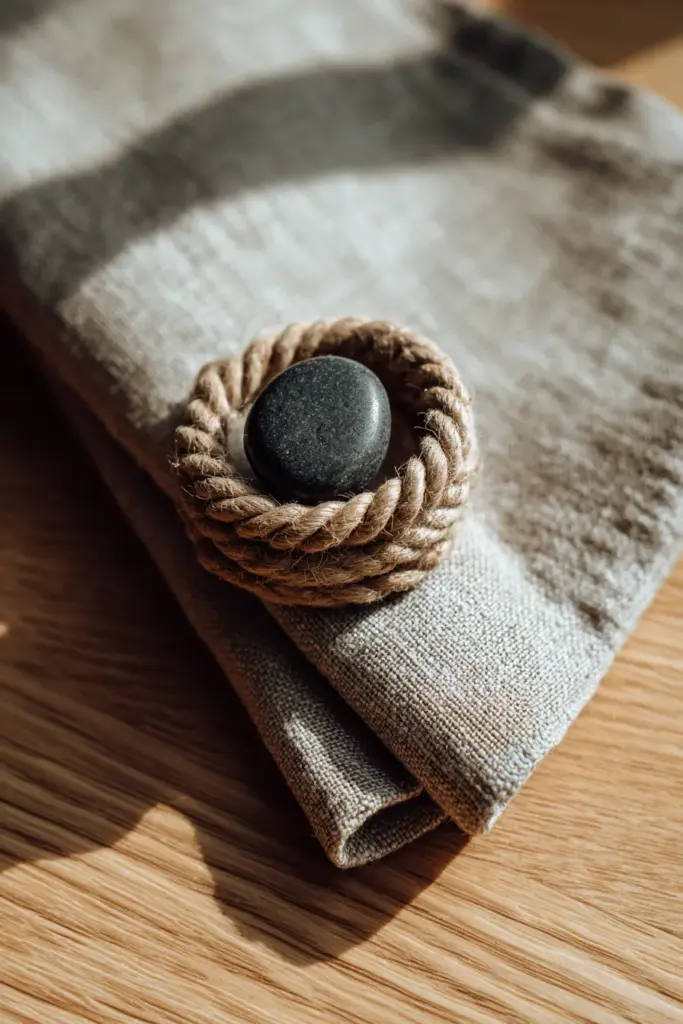
This design takes the twine-wrapped ring one step further by pressing a small flat pebble or piece of air-dried clay into the surface — a subtle but striking focal point that evokes Japanese rock garden aesthetics.
What You’ll Need
- Twine-wrapped ring base (from Design 1)
- A small flat river stone, or a piece of air-dry clay shaped into a disc
- Strong craft glue or epoxy
- Optional: matte black paint on the stone for contrast
Steps
Step 1: Prepare your stone or clay disc. If using a river stone, clean and dry it thoroughly. If using air-dry clay, shape a small oval or rounded rectangle, press it gently flat, and allow it to dry completely (24 hours). Paint matte black or leave in its natural clay color.
Step 2: Mark placement. Decide where on the ring the stone will sit — typically centered on the top-facing side. Mark lightly with a pencil.
Step 3: Apply adhesive. Use a strong craft glue or two-part epoxy for best hold. Apply to the back of the stone and press firmly onto the ring. Hold in place for one full minute.
Step 4: Allow to cure. Leave undisturbed for at least two hours before use.
How to Style Japandi Napkin Rings on Your Table
Crafting the rings is only half the practice. How you place them matters just as much.
In Japandi table styling, less is always more. Pair your handmade rings with:
- Unbleached linen napkins folded into a simple pocket fold or loose fan
- Matte ceramic plates in warm whites, earthy beiges, or muted sage
- A single bud vase with one stem — dried pampas, a branch of eucalyptus, or a sprig of greenery from your garden
- Wooden or stone serving pieces rather than polished metals
- Candlelight over overhead lighting whenever possible — the warm flicker brings the natural materials alive
Place napkin rings slightly off-center on the plate, or alongside the fork on a folded napkin. Resist symmetry for the sake of it. Let things feel human.
For a biophilic touch — deeply Japandi in spirit — add a small pot of air plants as a centerpiece, or scatter a few smooth river stones between place settings. The table should feel like an extension of the natural world, not a performance of it.
Quick Tips for Storage and Care
- Store wrapped rings in a cool, dry place away from direct sunlight to prevent fading
- For paper rings, keep in a small cloth pouch or between sheets of tissue paper
- Re-tighten any loose twine ends with a small dab of craft glue
- In humid months, give natural fiber rings a light mist of fabric protector spray
Key Takeaways
- Japandi napkin rings blend Japanese minimalism and Scandinavian warmth into one quiet, functional craft
- Three beginner-friendly designs: twine-wrapped wood, origami paper, and stone-embedded rings
- All materials are locally sourceable in the Philippines for under ₱100 per ring
- No power tools required — just patience, glue, and an appreciation for natural texture
- Style with unbleached linen, matte ceramics, and single-stem botanicals for a complete Japandi table
- Embrace imperfection — wabi-sabi reminds us that the handmade mark is the beauty
Conclusion
There is a kind of joy in making something small and beautiful with your hands. In a world that moves quickly and loudly, the act of wrapping twine around a bamboo ring — slowly, deliberately — is itself a form of rest.
These napkin rings will not last forever. The twine may loosen. The paper may soften in the rain season. The stone may one day fall away. And that is exactly as it should be. Wabi-sabi teaches us that impermanence is not a flaw — it’s the whole point.
Set your table with care. Light a candle. Fold the linen gently. And let the beauty of what you’ve made with your own hands quietly anchor the meal.
That’s the ERYLIN way.
Frequently Asked Questions
How do you make simple Japandi napkin rings at home?
Start with a bamboo tube or cardboard roll as your base, then wrap tightly with linen twine or abaca rope secured with craft glue. Finish with a dried stem or small pebble for an organic, Japandi-appropriate accent. No special tools are needed — just patience and a steady hand.
What materials are best for DIY Japandi napkin holders?
Natural, tactile materials are ideal: bamboo, linen twine, abaca rope, washi paper, river stones, and air-dry clay. These align with Japandi’s commitment to organic textures and honest materials. Avoid anything shiny, synthetic, or overly decorative.
Can I make Japandi napkin rings without wood tools?
Absolutely. Cardboard tubes from paper towel rolls make excellent bases — reinforce with glue for structure. Washi paper origami rings require no cutting tools beyond scissors. All three designs in this guide are tool-free and beginner-friendly.
How do I style napkin rings in a minimalist Japandi table setting?
Pair handmade rings with unbleached linen napkins, matte ceramic plates, and a single-stem bud vase. Keep the color palette to warm neutrals — beige, black, wood tones, and dusty sage. Let candlelight do the rest. Resist over-styling; space and simplicity are the point.
Where can I source Japandi craft materials in the Philippines?
Divisoria is ideal for bamboo scraps, linen twine, and craft supplies at low cost. Abaca rope is available at local markets and craft shops in Metro Manila. Washi paper and matte sealant can be found at National Bookstore or Craft Central branches. Many materials — river stones, dried leaves, twigs — can be foraged from your own garden or neighborhood for free.