Table of Contents
There’s something quietly revolutionary about taking a forgotten dresser and turning it into a low-profile coffee table that anchors your living room with calm. Japandi design—that beautiful marriage of Japanese minimalism and Scandinavian warmth—doesn’t demand newness. It whispers for intention, for pieces with soul, for the kind of beauty that comes from your own hands reshaping what already exists.
Upcycling furniture in the Japandi style isn’t just about saving money or being eco-conscious, though both are wonderful side effects. It’s about creating a space that feels like breath itself—uncluttered, natural, and deeply personal. When you sand down a thrift store find and finish it with matte oil, you’re not just refinishing wood. You’re participating in wabi-sabi, the Japanese art of finding perfection in imperfection.
This guide will walk you through the serene world of Japandi furniture upcycling for your living room. We’ll explore which pieces to hunt for, how to transform them with beginner-friendly techniques, and the natural materials that bring this aesthetic to life. Whether you’re working with $40 or have an entire weekend to dedicate to a project, there’s a path here for you.
Let’s begin where all good things do—with possibility and a little bit of dust.
Why Upcycle for Japandi Interiors?
The Philosophy Behind Repurposed Beauty
Japandi design celebrates what endures. Both Japanese and Scandinavian traditions honor craftsmanship, natural materials, and the idea that less truly can be more. When you upcycle a vintage chest or transform pallet wood into floating shelves, you’re aligning with centuries of design wisdom that values resourcefulness over excess.
The environmental impact matters too. By choosing reclaimed wood, FSC-certified oak remnants, or thrifted pieces, you’re keeping furniture out of landfills while avoiding the carbon footprint of new manufacturing. This zero-waste approach isn’t just trendy—it’s foundational to creating spaces that feel good in every sense.
The Aesthetic Advantage
Upcycled pieces carry history in their grain. A mid-century dresser transformed into a media console brings texture and character that brand-new furniture simply can’t replicate. The dings, the subtle color variations, the way old wood responds to oil—these imperfections create the authentic, lived-in quality that makes Japandi interiors feel like sanctuaries rather than showrooms.
Modern Japandi spaces thrive on the tension between sleek minimalism and organic warmth. An upcycled coffee table with visible wood grain sitting atop a neutral linen rug creates exactly this balance. You’re not decorating a room; you’re composing a feeling.
Essential Japandi Upcycling Principles
Embrace Functional Minimalism
Before you begin any upcycling project, ask yourself: Does this piece serve my life? Japandi interiors reject clutter and decoration for decoration’s sake. Your upcycled furniture should offer hidden storage, serve multiple purposes, or simply bring such visual calm that its presence alone is the function.
Consider a vintage wooden ladder transformed into a blanket display. It’s storage, yes, but it’s also sculpture—vertical interest that doesn’t crowd your floor space. This is the KonMari method applied to DIY: if it doesn’t spark joy or serve a clear purpose, it doesn’t earn a place in your transformation plans.
Honor Natural Materials and Low-VOC Finishes
The materials you choose for your upcycling projects matter as much as the furniture itself. Reclaimed wood, rattan backing panels, linen upholstery, and matte black hardware all speak the Japandi language. Stay away from glossy finishes, plastic elements, or anything that feels synthetic.
When selecting paints and finishes, prioritize low-VOC or zero-VOC options. These non-toxic choices protect your indoor air quality while you work and afterward. Natural oil finishes—like tung oil or Danish oil in matte formulations—enhance wood grain without adding artificial shine. Your living room should smell like wood and linseed oil, not chemical fumes.
Work With Wabi-Sabi Imperfections
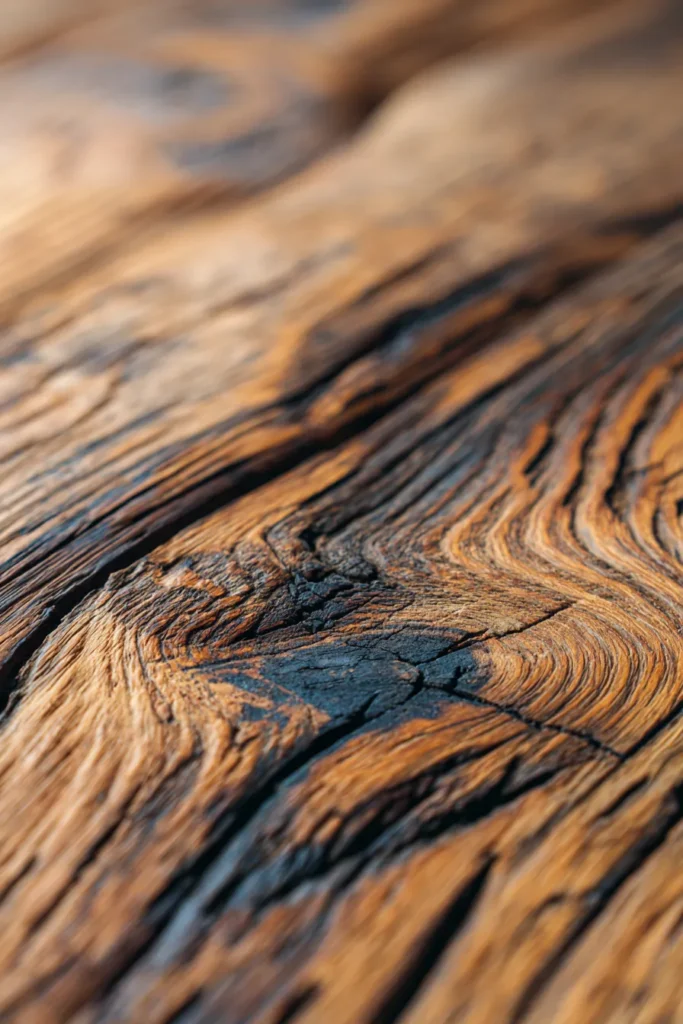
Not every scratch needs sanding away. Not every dent requires wood filler. Wabi-sabi teaches us to see beauty in wear, in the marks time leaves behind. When you’re upcycling for Japandi style, aim for improved rather than perfect.
A coffee table with slight surface variations tells a story. A shelf with natural wood knots adds organic character. Sand enough to create a smooth finish, but don’t obliterate the soul of the piece in pursuit of flawlessness. This mindset shift—from renovation to gentle transformation—defines authentic Japandi upcycling.
Budget Japandi Upcycling: Projects Under $100
Transform a Thrift Dresser Into a Low-Profile Media Console
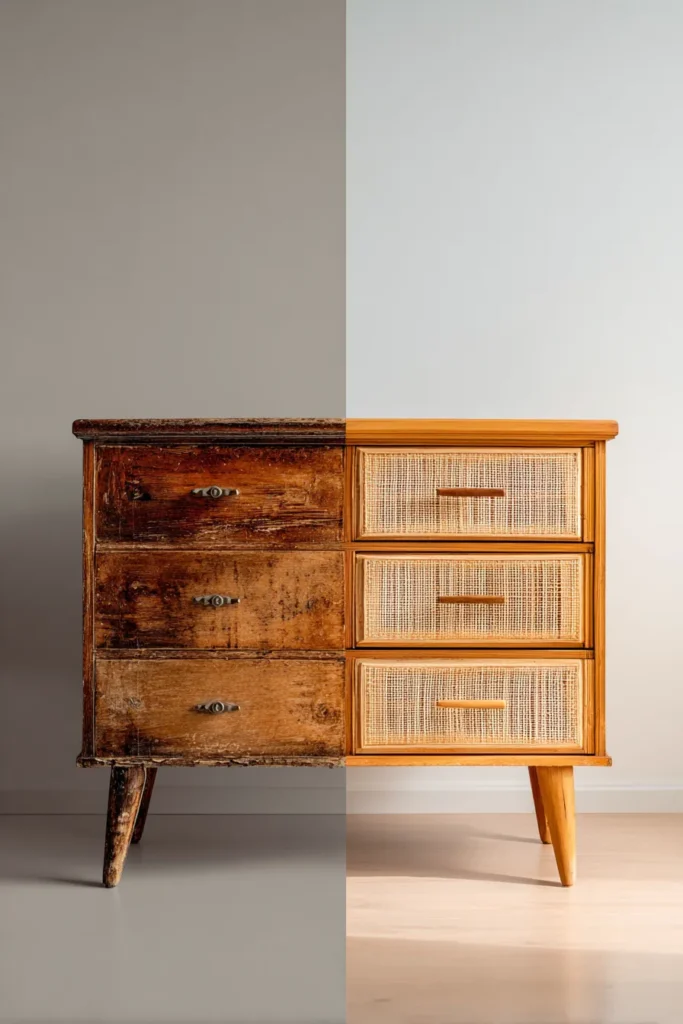
This is the gateway project for Japandi upcycling, and it delivers maximum impact for minimal investment. Hunt thrift stores for solid wood dressers—look for pieces from the 1960s-80s with simple lines and good bones. Avoid particleboard; you want real wood that will respond beautifully to sanding and oil.
Step-by-step transformation:
1. Remove hardware and drawers. Strip away old knobs and pulls. If drawers are damaged, you can remove fronts entirely to create open shelving.
2. Sand in stages. Start with 120-grit sandpaper to remove old finish and smooth rough spots. Follow with 220-grit for a silky surface. Work in a well-ventilated area or outdoors—dust masks are essential.
3. Add rattan panels (optional). Cut rattan webbing to fit drawer fronts or side panels. This adds textural warmth and is surprisingly easy to attach with small finishing nails or wood glue. The contrast between wood and woven material is quintessentially Japandi.
4. Shorten the legs. Many vintage dressers sit too tall for modern low-profile aesthetics. Carefully measure and cut legs down 4-6 inches for that ground-hugging Japandi look. If it doesn’t have legs, add simple tapered legs in oak or walnut.
5. Finish with matte oil. Apply Danish oil or tung oil in thin coats, allowing each to penetrate fully. This brings out the wood’s natural beauty while creating a soft, touchable finish. Buff with a clean cloth.
Estimated cost: $35-$60 (dresser) + $15-$20 (rattan, hardware, oil) = $50-$80 total
Create Floating Shelves From Pallet Wood
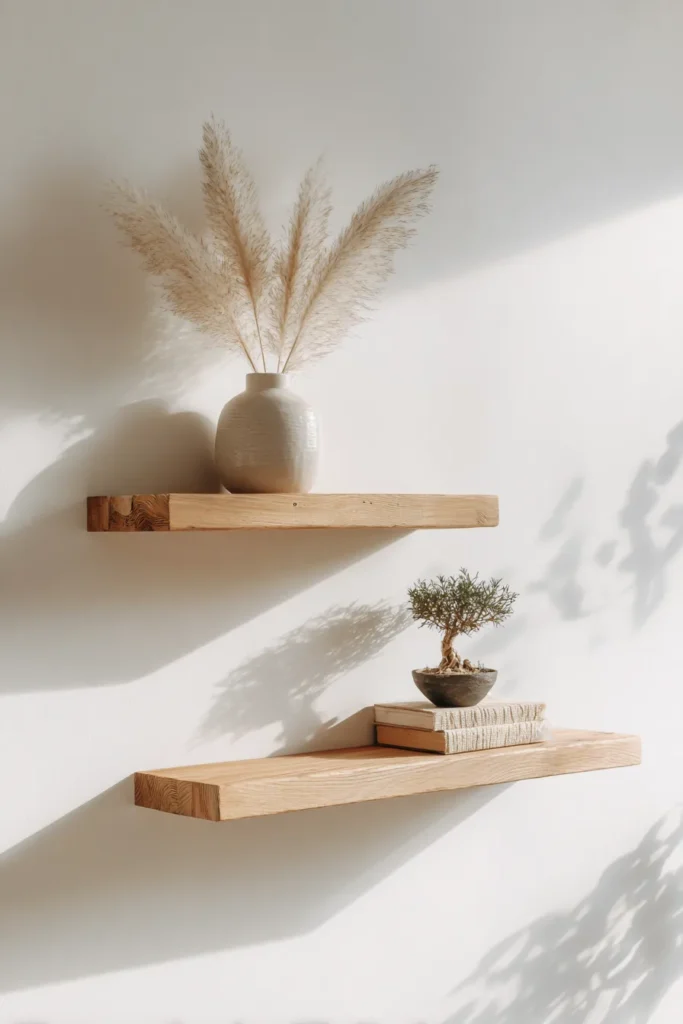
Free or nearly-free pallet wood offers incredible potential for Japandi-style shelving. The key is selecting pallets carefully—look for those stamped “HT” (heat-treated, not chemically treated) and avoid any with stains or strong odors.
Transformation process:
1. Disassemble and select boards. Use a pry bar to carefully separate pallet boards. Choose pieces with interesting grain and minimal damage.
2. Cut to desired length. For a typical living room shelf, 36-48 inches works well. A table saw makes this easy, but a hand saw and some patience works too.
3. Sand thoroughly. Pallet wood needs extra attention. Start with 80-grit to remove splinters and rough patches, then progress to 120 and 220. The wood should feel like silk.
4. Add backing interest. Cut a piece of thin plywood or even kraft paper to fit behind your shelf. Adhere rattan webbing or leave it plain. This creates subtle depth when mounted.
5. Mount with hidden brackets. Use floating shelf brackets for that seamless, minimalist look. Ensure you anchor into wall studs for safety.
6. Finish naturally. A light coat of matte polyurethane or raw linseed oil preserves the wood while maintaining that organic Japandi feel.
Estimated cost: $0-$10 (pallets) + $15 (brackets, sandpaper, finish) = $15-$25 total
Upcycle a Vintage Chair With Linen Upholstery
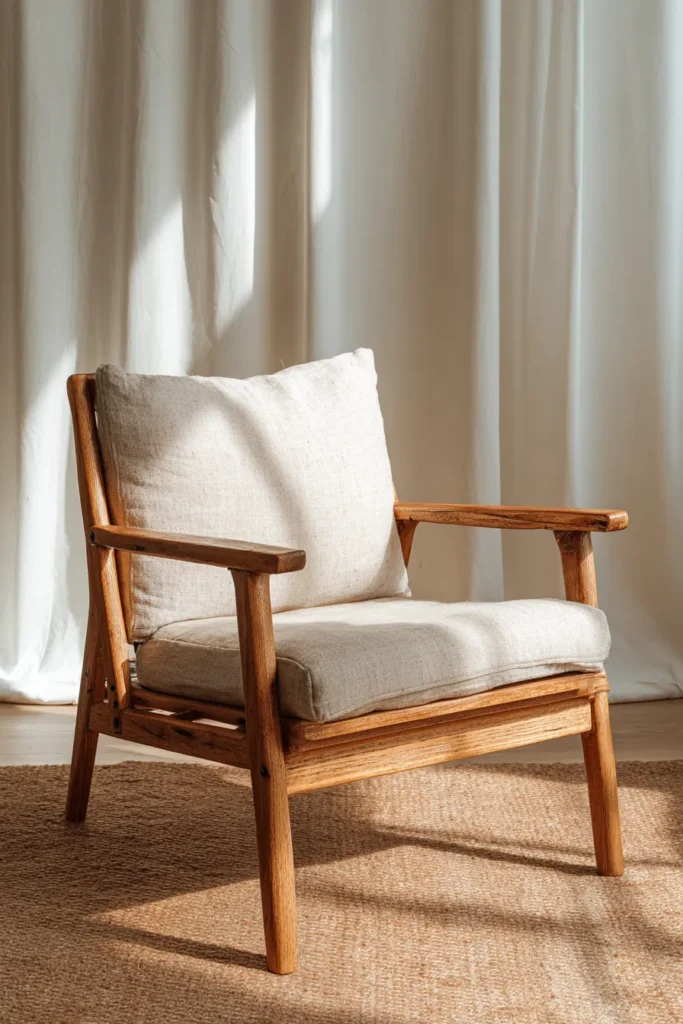
A single statement chair can define your Japandi living room. Look for wooden chairs with clean lines at estate sales or online marketplaces. Mid-century modern pieces work beautifully, as do simple wooden dining chairs.
Quick refresh method:
1. Assess the frame. Tighten any loose joints with wood glue and clamps. Sand the wood frame following the same 120/220 progression.
2. Strip old upholstery. Remove existing fabric, noting how it was attached for easier reassembly. Save the old fabric as a pattern.
3. Add new cushioning if needed. High-density foam in 2-3 inch thickness creates comfortable seating. Cut to size with an electric knife or request cuts at the fabric store.
4. Upholster in natural linen. Choose oatmeal, warm gray, or soft white linen. This breathable, textural fabric epitomizes Japandi style. Use a staple gun to attach, pulling fabric taut but not distorted.
5. Finish wood with matte oil. Treat the frame’s wood the same way as larger pieces—with respect and natural finishes.
Estimated cost: $20-$40 (chair) + $30 (linen) + $15 (foam, staples, finish) = $65-$85 total
Sourcing Strategies: Where to Find Upcycling Gems
Thrift Stores and Estate Sales
Timing matters when hunting for furniture with Japandi potential. Visit thrift stores on weekday mornings when new inventory often appears. Estate sales in older neighborhoods frequently yield solid wood pieces from the 1950s-70s—the golden era for simple, well-constructed furniture.
Look past ugly paint colors and dated finishes. Train your eye to see bone structure—clean lines, quality joinery, solid wood construction. A hideous brown dresser might have perfect proportions for your media console dreams. Bring a tape measure and your room dimensions on your phone.
Online Marketplaces and Free Sources
Craigslist’s “free” section and Facebook Marketplace are goldmines for upcyclers. Search terms like “solid wood,” “vintage,” “mid-century,” and even “needs TLC.” People often give away quality pieces simply because they’re tired of them or moving.
Nextdoor and Buy Nothing groups in your area frequently offer furniture for free. Join several local groups and check daily. Respond quickly with pickup availability—good free furniture moves fast. Always inspect pieces in person before transporting them home.
Construction Sites and Lumber Yards
Ask contractors working in your area if they have scrap wood from renovations. High-quality oak, walnut, or maple flooring remnants can become stunning shelf material. Lumber yards often have “cut-off” bins with short pieces at deeply discounted prices—perfect for smaller projects.
Reclaimed wood suppliers offer more polished options if you’re willing to spend a bit more. These pre-cleaned and de-nailed boards save significant prep time and offer reliable quality. Look for sellers who provide wood history—barn wood, factory flooring, or dismantled furniture.
Step-by-Step: DIY Japandi Coffee Table From an Old Dresser
This signature project transforms a dated dresser into a stunning low-profile coffee table that anchors your Japandi living room with organic elegance. Budget this project at 6-8 hours over a weekend.
Materials Needed
- Solid wood dresser (thrift store find)
- Sandpaper: 80, 120, 220 grit
- Orbital sander (optional but helpful)
- Danish oil or tung oil
- Matte black hairpin legs (8-12 inches) or wood legs
- Wood filler (for any necessary repairs)
- Rattan webbing (optional, for drawer fronts)
- Clean cloths for oil application
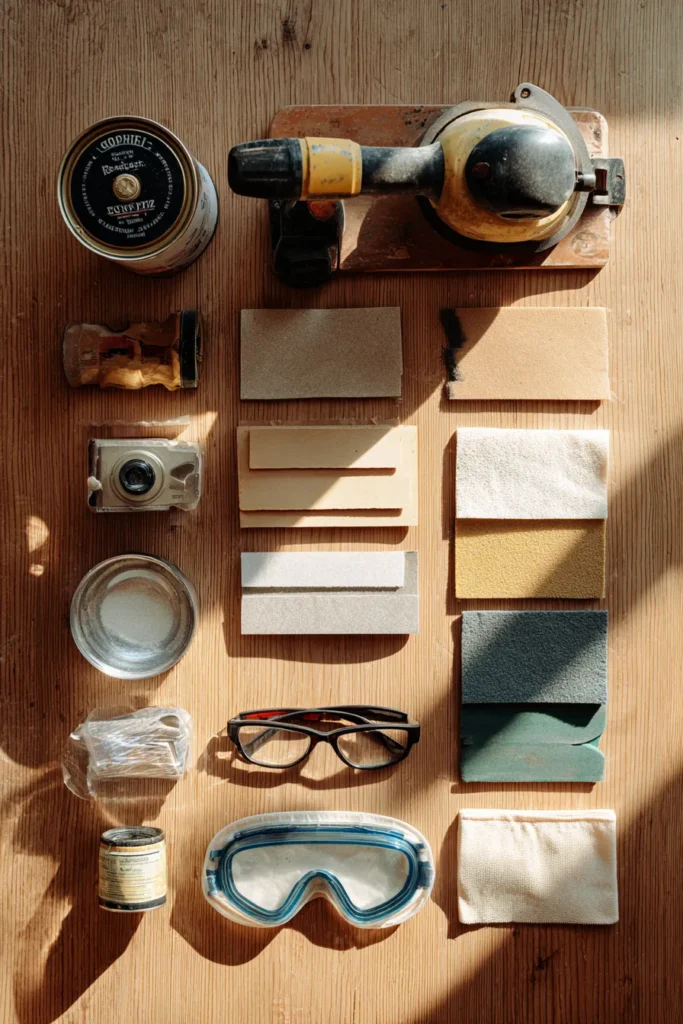
- Dust mask and safety glasses
The Transformation Process
Preparation Phase:
Remove all drawers and hardware. Work in your garage, outdoor space, or well-ventilated area. Lay down drop cloths to catch dust and drips. Examine the dresser’s structure—is it solid? Are joints tight? If you find wobbly areas, apply wood glue and clamp overnight before proceeding.
Structural Decisions:
Decide whether to keep drawers functional or remove fronts for open shelving. Functional drawers offer hidden storage for remotes, coasters, and living room necessities—very Japandi. Open shelving creates display space for carefully curated books or ceramics. Both approaches work; choose based on your storage needs.
The Sanding Journey:
Begin with 80-grit sandpaper if old finish is thick or damaged. Sand with the grain, never against it. An orbital sander speeds this process dramatically but isn’t essential—hand sanding works fine for smaller pieces and gives you better control.
Progress to 120-grit for overall smoothing. This is where the wood starts revealing its character. You’ll see grain patterns emerge, color variations appear. Take your time here; good sanding makes everything else easier.
Finish with 220-grit for a silky surface that invites touch. The wood should feel smooth as river stone. Wipe away all dust with a slightly damp cloth and let dry completely.
Adding Textural Interest:
If using rattan webbing for drawer fronts, cut panels to fit using sharp scissors or a utility knife. Secure with small finishing nails around edges or use wood glue for a seamless look. This woven texture adds warmth and creates visual interest while maintaining simplicity.
Leg Attachment:
Flip the dresser upside down. Mark leg positions—typically one at each corner for a four-drawer dresser. For longer pieces, add a center leg on each side for stability. Attach hairpin legs or wooden legs according to manufacturer instructions, ensuring each is level.
Aim for 8-12 inch legs to achieve that low-profile aesthetic. Too tall and it reads as dresser; at coffee table height, it becomes furniture with purpose and presence.
The Final Finish:
Apply Danish oil or tung oil with a clean cloth, working in thin coats. Let the first coat penetrate for 15-20 minutes, then wipe away excess. Wait 24 hours and apply a second coat. Two coats typically suffice, though you can add a third for deeper richness.
The oil finish enhances wood grain while creating a soft matte surface that improves with age. It’s maintenance-friendly too—simply reapply oil annually to refresh the finish and protect the wood.
Styling Your Creation:
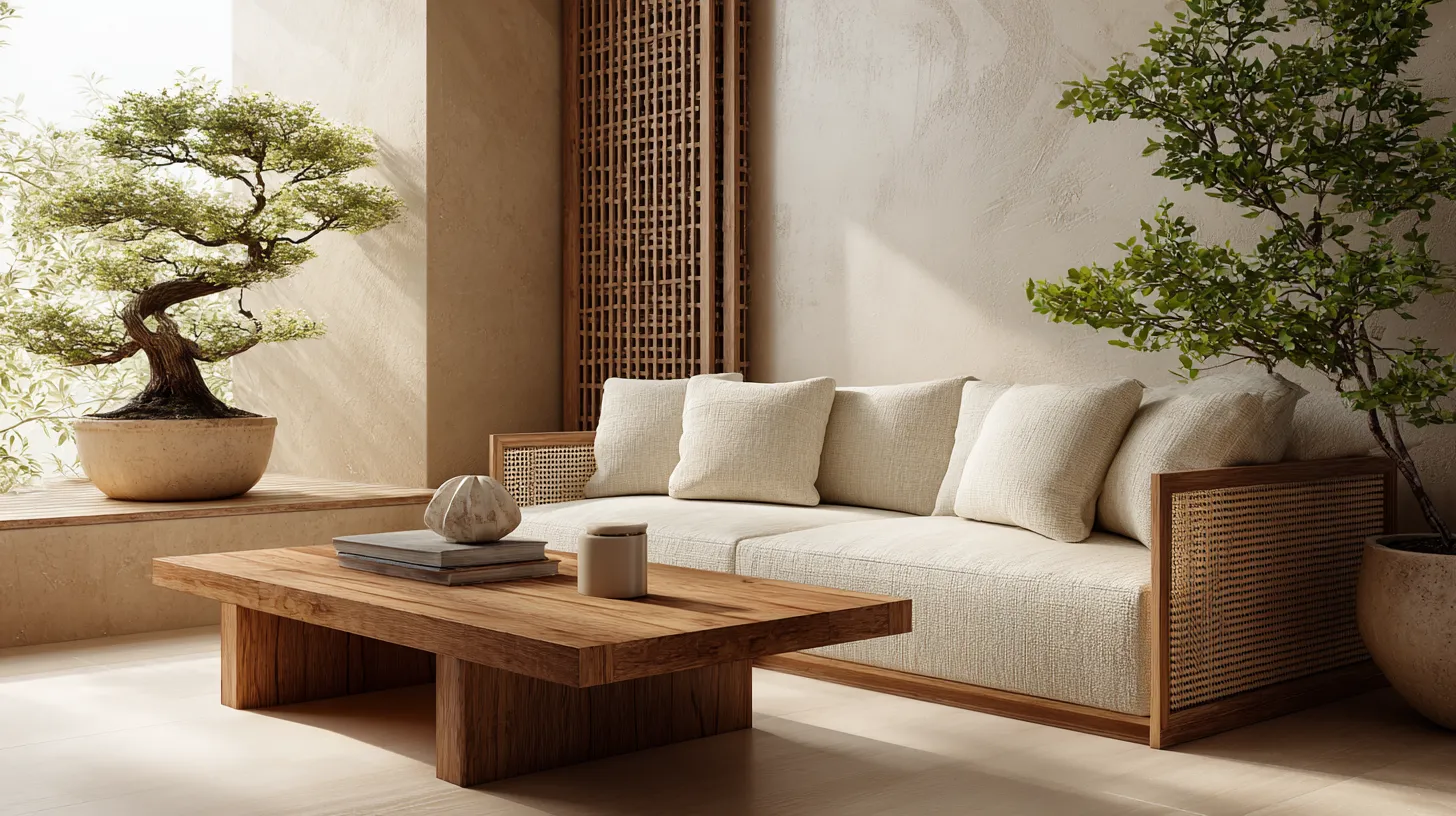
Place your new coffee table atop a natural fiber rug. Style with a wooden tray holding a ceramic cup, a small bonsai or simple vase, and perhaps one beautiful book. Remember: in Japandi design, empty space is as important as objects. Let your upcycled piece breathe.
Material Comparison for Japandi Upcycling Projects
| Piece Type | Recommended Source | Upcycle Method | Est. Cost | Key Japandi Elements |
|---|---|---|---|---|
| Coffee Table | Vintage dresser | Sand, matte oil, low legs, optional rattan panels | $50-$80 | Reclaimed wood, minimalist functionality, hidden storage |
| Floating Shelves | Pallet wood | Sand thoroughly, matte finish, hidden brackets | $15-$25 | Zero-waste sourcing, natural grain, biophilic design |
| Media Console | Mid-century sideboard | Clean, oil finish, replace hardware | $60-$100 | Clean lines, functional storage, organic materials |
| Side Table | Tree stump or log | Sand top, stabilize, seal with matte poly | $0-$20 | Wabi-sabi character, nature indoors, organic form |
| Accent Chair | Vintage wooden chair | Reupholster in linen, oil wood frame | $65-$85 | Natural textiles, craftsmanship, tactile comfort |
| Plant Stand | Wooden stool | Cut to desired height, sand, oil | $10-$30 | Vertical greenery, functional minimalism |
Common Mistakes in Japandi Furniture Upcycling (And How to Avoid Them)
Over-Styling and Visual Clutter
The biggest pitfall is transforming too many pieces or adding too many decorative elements. Japandi demands restraint. If you upcycle five furniture pieces for one living room, the space feels busy rather than calm, regardless of how minimalist each individual piece is.
The fix: Choose 1-2 statement upcycled pieces per room. Let them shine against a backdrop of simplicity. A beautiful refinished coffee table doesn’t need to compete with upcycled shelves, a refinished media console, and a transformed side table in the same sightline.
Using Glossy or Overly Modern Finishes
High-gloss polyurethane screams 1990s furniture flip, not Japandi serenity. Similarly, ultra-modern chrome hardware or acrylic elements clash with the natural, organic aesthetic you’re trying to achieve.
The fix: Always choose matte or satin finishes for both wood treatments and hardware. Opt for brass in aged finish, matte black steel, or simple wood knobs and pulls. If a finish catches light and creates shine, it’s wrong for Japandi.
Ignoring Scale in Small Living Rooms
That massive armoire might have beautiful bones, but if your living room is 200 square feet, turning it into storage will overwhelm the space. Japandi design in small spaces requires even more careful consideration of proportion and visual weight.
The fix: Measure twice, acquire once. Know your room dimensions and create a rough floor plan before bringing home furniture to upcycle. In small spaces, prioritize low-profile pieces, wall-mounted options, and furniture with legs (which create visual lightness by showing floor beneath).
Neglecting Proper Ventilation and Safety
Sanding creates fine dust that’s harmful to breathe. Some finishes emit VOCs during application and curing. Working in your living room without proper protection endangers your health and contaminates your space.
The fix: Always sand outdoors or in a garage with open doors. Wear a proper dust mask rated for fine particles—not just a cloth mask. Use low-VOC finishes and allow pieces to off-gas completely before bringing them indoors. If you smell finish, it’s still curing.
Forgetting Renter-Friendly Adaptations
Not everyone owns their home. Drilling into walls for shelves or making permanent modifications limits your options if you’re renting.
The fix: Use command strips rated for heavier weight, lean shelves against walls rather than mounting them, or choose freestanding upcycled pieces that require no installation. Picture ledge shelves propped on dressers or mantels achieve the floating shelf look without wall damage.
Post-Upcycle Care and Seasonal Maintenance
Embracing Aging With Wabi-Sabi Grace
Your upcycled furniture will change over time—and that’s beautiful. Wood darkens or lightens depending on sun exposure. Oil finishes develop a patina. Small dings and marks accumulate. This gradual transformation is part of the Japandi aesthetic, not a flaw to prevent.
Embrace these changes as evidence of a life well-lived. Your coffee table’s water ring from a forgotten glass tells the story of lazy Sunday mornings. The slight fading on one side of your media console marks where afternoon light streams through your window.
Annual Oil Refreshing
Once yearly, refresh oiled wood surfaces to maintain protection and enhance beauty. Lightly sand any rough spots with 220-grit sandpaper, wipe clean, and apply a fresh coat of the same oil you used originally. Buff away excess after 20 minutes.
This simple maintenance takes 30 minutes per piece and extends the life of your upcycled furniture indefinitely. Choose a weekend in fall or spring, make it a ritual, and enjoy the meditative quality of caring for objects with your hands.
Plant-Safe Considerations
If you display plants on your upcycled furniture, protect wood surfaces from water damage. Use waterproof saucers under all pots and wipe up spills immediately. Consider applying an extra coat of finish to surfaces that will hold plants, or use decorative trays as barriers.
For biophilic design that’s also furniture-friendly, choose plants like snake plants or ZZ plants that require infrequent watering, reducing spill risk. Your greenery and your upcycled pieces can coexist beautifully with small precautions.
Small-Space Japandi Upcycling Adaptations
Wall-Mounted Repurposed Elements
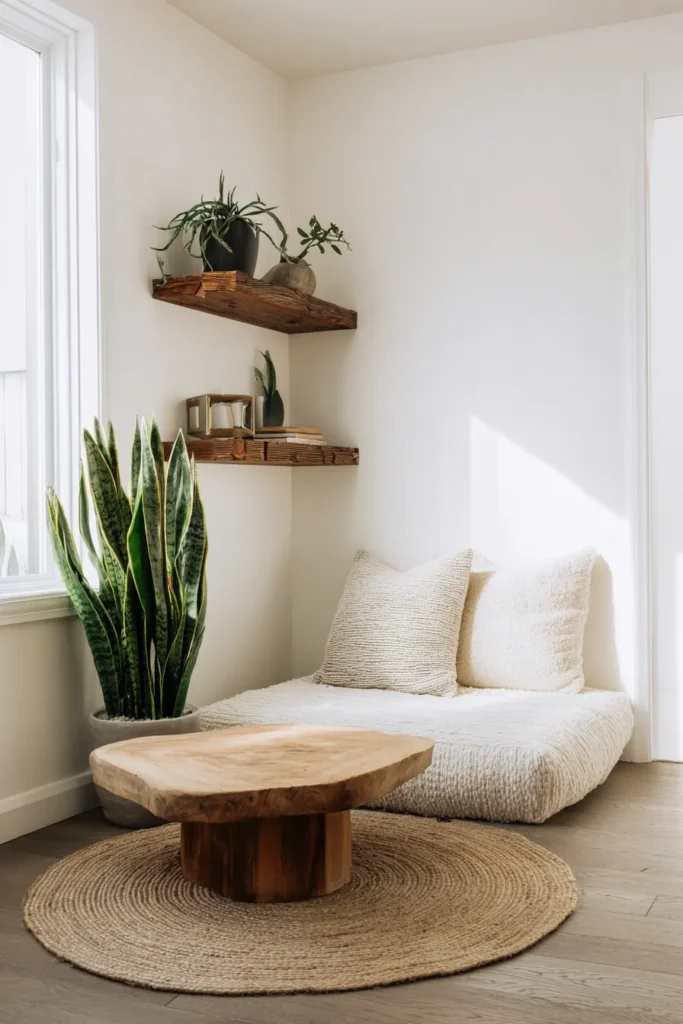
In tight living rooms, every square foot of floor space matters. Look for vintage items that can mount to walls: old drawers become floating shelves, vintage mirrors add depth without furniture footprint, wooden crates arranged in grid patterns offer display without bulk.
Use heavy-duty picture hanging strips or traditional wall anchors depending on weight. The key is maintaining that visual lightness Japandi demands—even wall-mounted pieces should have breathing room between them.
Multifunctional Transformations
A vintage trunk becomes both coffee table and storage. An upcycled dresser serves as media console, display surface, and concealed organization. In small spaces, every piece must earn its place through multiple functions.
When evaluating potential upcycling projects, ask: “Can this do double duty?” If not, keep looking. Japandi small-space living is about curating carefully, not cramming cleverly.
Vertical Emphasis
When horizontal space is limited, build upward. Transform ladders into blanket storage. Create tall narrow shelving from reclaimed wood. Upcycle a tall cabinet into a sleek bar cart. Vertical elements draw the eye up, making rooms feel more spacious.
Maintain proportion by keeping tall pieces narrow—no more than 18-24 inches deep. This creates presence without crowding walkways or sightlines.
Essential Checklist: Your Japandi Upcycling Toolkit
Before beginning any project, gather these essentials:
Safety and Preparation:
- Dust mask rated for fine particles
- Safety glasses
- Work gloves for handling rough wood
- Drop cloths or cardboard for protecting work surfaces
- Well-ventilated work area
Sanding and Smoothing:
- 80-grit sandpaper (for heavy old finish removal)
- 120-grit sandpaper (primary smoothing)
- 220-grit sandpaper (final silky finish)
- Orbital sander (optional, saves time on large pieces)
- Tack cloth or slightly damp rag for dust removal
Finishing and Hardware:
- Low-VOC Danish oil or tung oil in matte finish
- Natural bristle brushes or clean cotton cloths
- Wood filler for any repairs
- Matte black or brass hardware (knobs, pulls, hinges)
- Rattan webbing for textural panels
Tools:
- Screwdriver set (flat and Phillips head)
- Hammer
- Measuring tape
- Level
- Pencil for marking
- Small finishing nails
- Wood glue
Styling Elements:
- Natural fiber rug or jute mat
- Linen textiles
- Ceramic pieces for display
- Small potted plants or bonsai
Closing Thoughts: The Soul of Transformation
There’s a particular satisfaction that comes from running your hand across a surface you’ve personally sanded and oiled. You know every groove in that wood, every variation in color, every small imperfection you chose to keep. This intimacy between maker and object is what transforms a living room from simply decorated to genuinely inhabited.
Japandi upcycling isn’t a trend to follow or a style to copy. It’s a practice of paying attention—to materials, to craft, to what already exists and what it might become. When you choose to transform rather than purchase, to refinish rather than discard, you’re participating in a quieter, slower way of creating home.
Your living room doesn’t need to look like anyone else’s. It needs to feel like yours—like a breath you’ve been holding can finally release. Every piece you upcycle adds another layer to that feeling, another story, another moment of your hands shaping your space.
Start with one project. Maybe it’s a small side table, maybe it’s that dresser you’ve been eyeing at the thrift store for weeks. Sand it on a Saturday morning when light slants across your garage floor. Oil it gently, watching the grain emerge. Bring it home and place it exactly where it belongs.
This is how you build a home. One careful transformation at a time.
Frequently Asked Questions
Can I upcycle furniture for Japandi style without woodworking experience?
A: Absolutely. The projects outlined here—sanding, oiling, and simple hardware replacement—require patience more than skill. Start with a small piece like a side table or single shelf to build confidence. Watch beginner tutorials on YouTube for sanding techniques, and remember that Japandi aesthetics embrace imperfection. Your first project doesn’t need to be flawless; it needs to be yours.
Where can I source free or inexpensive wood for Japandi upcycling projects?
A: Check Craigslist and Facebook Marketplace u0022freeu0022 sections daily for solid wood furniture. Join local Buy Nothing groups on Facebook and Nextdoor communities. Ask contractors working in your neighborhood about scrap hardwood from renovations—oak flooring remnants make beautiful shelves. Pallets stamped u0022HTu0022 (heat-treated) from behind retail stores offer free material, though they require more prep work. Construction site dumpsters sometimes contain usable wood, but always ask permission first.
What’s the best finish for upcycled Japandi furniture if I have pets or children?
A: Use hard wax oil or a matte polyurethane designed for floors—both offer durability while maintaining the natural look Japandi requires. Apply 2-3 thin coats rather than one thick coat for better protection. Danish oil provides beautiful results but needs annual refreshing in high-use areas. For pieces that see heavy daily use, consider water-based polyurethane in satin finish—it’s low-VOC, durable, and dries quickly. Always let any finish cure fully (1-2 weeks) before regular use.
How do I know if thrift store furniture is worth upcycling for Japandi style?
A: Look for solid wood construction—knock on it; solid wood sounds dense and full, while particleboard sounds hollow. Check joints; they should be tight and sturdy. Assess the piece’s u0022bonesu0022—does it have clean, simple lines? Can you visualize it without the current ugly finish? Avoid pieces with extensive water damage, broken joints, or ornate carved details that clash with minimalism. The best candidates are mid-century pieces from the 1950s-70s, simple pine furniture, and solid wood dressers or tables with minimal ornamentation.
What are the most common mistakes to avoid when upcycling for small Japandi living rooms?
A: The biggest mistakes are choosing oversized pieces that overwhelm the space, over-sanding and losing natural wood character, using glossy finishes that feel too modern, and upcycling too many items at once (which creates clutter despite individual pieces being minimalist). In small spaces, prioritize low-profile furniture with visible legs, stick to 1-2 upcycled statement pieces, and ensure adequate negative space around each item. Also avoid painting everything white—natural wood tones add warmth essential to Japandi aesthetics, even in compact rooms.